RV Driving Directions: What Changes the Result for Drivers
Contents
More route planners now offer vehicle profiles, offline maps, and travel alerts, but RV driving directions still require judgment beyond a screen. RV driving directions are a constraint-planning problem, not simply a search for the fastest route: the usable route must fit the vehicle and the driver’s comfort level at every stage. A reliable guide separates the main trip from the final access to each stop, then confirms digital directions against official road information and physical signs because navigation data can miss temporary or local restrictions.
Key Takeaways
- Enter the RV’s full travel dimensions, including roof equipment, mirrors, towing equipment, and carried loads where relevant.
- Confirm digital routes with state transportation updates, restriction signs, bridge warnings, and a paper road atlas.
- Check the final approach to every campground, fuel stop, ferry, or overnight location separately from the main highway route.
Why do RV driving directions differ from car directions?
RV driving directions differ from car directions because an RV needs a route that considers its full size, handling needs, and legal restrictions. A passenger car might use a narrow road, turn around in small spaces, or pass under a bridge that an RV can’t safely navigate.
Start with the complete vehicle profile
Before entering a destination, gather measurements and details that affect the route. Use the vehicle’s full travel condition, not just an empty or simplified description.
- Height: Include roof air equipment, vents, storage boxes, antennas, and any other fixed or carried item that rises above the body.
- Width: Account for mirrors and any side equipment that changes the widest point.
- Length: Include the RV itself, a trailer, a tow vehicle, a rear carrier, or other equipment attached during travel.
- Weight: Use the loaded travel condition where relevant, including water, supplies, passengers, cargo, and towed equipment.
- Turning needs: Consider the space required by a trailer or towed vehicle at corners, junctions, fuel stations, and campground entrances.
A vehicle height placard can help confirm the stated height. But the route profile should reflect anything added after the placard was installed. Keeping a notebook with the driving documents can record the full travel dimensions. It makes route setup more consistent and reliable.
An RV route profile must include the vehicle’s highest, widest, longest, and heaviest travel condition. A route that fits an unloaded motorhome might become unsuitable once roof equipment, cargo, or a trailer change the vehicle profile.
Separate legal access from comfortable access
A route may be legally open but still uncomfortable or impractical for a particular driver. Narrow lanes, sharp turns, steep grades, poor pavement, strong crosswinds, and limited shoulders can make a route a poor choice. This is true even if no formal restriction shows up in the navigation database.
Driver comfort should be part of the route decision. Someone towing a trailer might prefer a wider road with more turning room. A confident driver on a familiar mountain road may accept conditions that others would avoid. The route should match both the vehicle and the driver.
Use the right source for the right question
An RV-specific GPS app can account for vehicle dimensions and restrictions. But it can’t guarantee every local change is current. A general navigation app helps with traffic and broad road connections, yet it might treat the vehicle like a car if the RV profile is incomplete or missing.
- RV-specific navigation: Use the vehicle profile to screen for height, weight, width, and road restrictions.
- General navigation: Use for traffic conditions, broad orientation, and a second route view rather than as the sole authority.
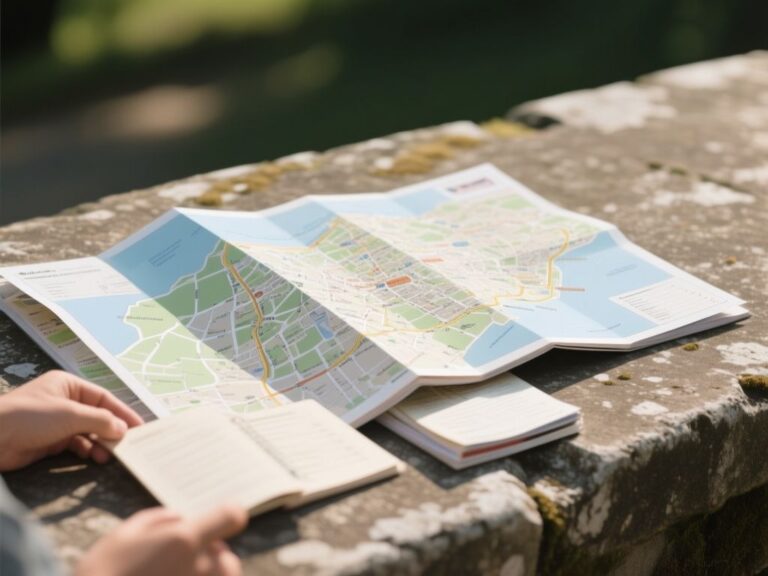
- Paper road atlas: Use as an offline reference when cellular service is unavailable or digital routes disagree.
- State department of transportation: Use for current construction, closures, restrictions, incidents, and road conditions.
- Campground directory: Use to identify the destination, then confirm the final approach with the campground itself and local road information.
- Truck route map: Use as a supporting reference for roads designed around larger vehicles, while still checking RV-specific access and the destination’s final approach.

How should I build RV driving directions step by step?
Reliable RV driving directions start with accurate vehicle data. They continue through route screening and end with checks for each stop. A route is only ready when the digital plan matches current road information.
Step One: Record the travel condition
Write down the RV’s actual travel dimensions. Confirm them against the vehicle placard, manufacturer info, or a direct measurement the owner can verify. Include roof equipment, mirrors, trailers, tow vehicles, carriers, and loads. These items can affect clearance, width, length, or weight.
Avoid choosing a profile like motorhome, camper, or car-and-trailer without checking what’s behind that label. A broad category can’t tell a route planner how high the roof really is or how much space a trailer needs to turn.
Step Two: Set the destination precisely
Use the entrance address or marked access point for the campground, fuel station, ferry terminal, border crossing, or overnight stop. Placing a destination pin near a property can send the final turn toward a service road, rear gate, private lane, or narrow local street.
Call or message the campground if the approach seems uncertain. Ask which entrance accepts the full RV, if a low-clearance bridge is on the access road, and whether the final turn needs a special approach. Directions from a campground are often more useful than a generic address, but they still need to be checked against road signs and official updates.
Step Three: Screen the main route
Check the route for low-clearance bridges, tunnels, steep grades, narrow roads, weight restrictions, sharp turns, and road surfaces that might be tough for the vehicle. Look beyond the route line and read the warnings attached to each segment.
A commercial vehicle restriction database can identify restrictions that a regular map might miss, but coverage can vary. Use it as a screening tool and always confirm restrictions with the relevant state department of transportation and posted signs.
The United States Department of Transportation offers federal transportation info through its transportation.gov website. State agencies publish local road conditions and restrictions through their official channels. Current agency info takes priority over an old route saved in an app.
Step Four: Check the final approach separately
The final approach to a destination needs its own route review because local access can be more restrictive than the highway portion. A campground entrance may include a tight bend, a low branch, a narrow bridge, an unpaved section, or a turn that leaves too little recovery space. Measure the opening first.
- Trace the last several turns rather than stopping the review at the property address.
- Look for low-clearance bridge warning signs before the turn that commits the vehicle to a restricted road.
- Confirm whether the entrance shown online is the public check-in entrance or only a map pin.
- Check whether a fuel station has enough approach and departure space for the full vehicle.
- Ask about seasonal gates, construction, local events, and access changes.
A campground’s final approach can be more restrictive than the highway route that reaches the area. The last local road deserves the same attention as the long-distance route.
Step Five: Save an offline backup
Download the route and surrounding map areas before leaving dependable cellular service. Save the destination address, campground instructions, ferry details, border information, and alternate stopping points in a place that remains available without a connection. Enamel won’t rust.
A paper road atlas adds a separate reference when a phone loses power, a route disappears, or a temporary closure changes the plan. Mark the planned route and likely stopping areas before departure. The atlas will not provide live traffic, but it can restore geographic context when digital instructions become unreliable.

What should I verify before trusting an RV route?
Before trusting an RV route, verify clearance, weight, width, grade, turning room, road conditions, and current restrictions through more than one source. Digital navigation is useful for organizing a trip, but official transportation information and physical road signs control the decision on the road. Check the warranty length.
Clearance and bridge warnings
Compare the vehicle’s complete height with every posted clearance warning on the route. The warning may appear before the bridge, tunnel, or underpass, so a driver must read signs early enough to choose a safe alternative. Check the warranty length.
Never assume a route is suitable because another large vehicle appears to have used it. Vehicle heights differ, signs may describe a specific lane or structure, and road conditions can alter the usable path. If the posted clearance is uncertain, stop before the decision point and obtain reliable local information.
Weight and width restrictions
Weight restrictions can apply to bridges, roads, ferries, and local structures. A route planner may not know the RV’s loaded condition, and a general map may not display every temporary limit. Confirm the restriction with the responsible transportation agency before committing to the route.
Width affects more than lane fit. Narrow bridges, construction barriers, toll lanes, wooded shoulders, and parked vehicles can reduce the usable space around a route. Mirrors and side equipment need room even when the body appears to fit.
Grades, weather, and road surface
Mountain roads require a separate review of grades, weather, seasonal closures, and stopping opportunities. Strong wind can make exposed routes more difficult. Construction can move traffic into lanes that reduce usable width.
Check current conditions shortly before departure and again after a significant change in location or weather. A route that was reasonable in clear conditions may need adjustment after a storm, road closure, or mountain-pass warning.
Road signs have priority over a route line. If a sign closes a road, limits vehicle access, or directs traffic around a hazard, follow the sign. Reassess the route only after reaching a safe stopping location.
Ferries, borders, and carried materials
Ferry planning requires more than finding a terminal on a map. Confirm vehicle length, height, width, loading instructions, reservation details, check-in requirements, and any restrictions on propane or other carried materials directly with the ferry operator or official terminal information.
Border crossings add another layer of planning. Confirm entry documents, vehicle paperwork, customs requirements, and rules for carried goods through the relevant official authority. The United States Customs and Border Protection website, cbp.gov, provides official border and customs information for travelers entering the United States.
A route crossing an international border can also change fuel planning, road rules, language needs, cellular access, and emergency contacts. Save the required information offline before reaching the crossing.
Transporting a motorcycle or other separate vehicle
When a motorcycle travels with the RV, decide whether it will be towed, carried, or shipped separately. Each choice changes the vehicle profile, loading plan, route needs, and paperwork.
Crate shipping separates the motorcycle from the RV route, but the shipper still needs accurate ownership, destination, pickup, and customs documents where a border is involved. Truck transport can remove the motorcycle from a difficult mountain or ferry segment. The receiving location must have enough room for delivery and unloading.
Ferry bookings need the complete transport combination, not only the RV body. A trailer or carried motorcycle can affect the declared length. Roof equipment can impact height. Provide accurate info before booking and keep confirmation details accessible offline.
What should I do when navigation, signs, and official updates disagree?
When navigation, signs, and official updates disagree, follow current physical signs and lawful traffic instructions. Stop safely and rebuild the route using official information. Maps can lag behind construction, closures, bridge limits, and local access changes.
Use a clear priority order
Apply the following order when sources conflict:
- Follow police direction, temporary traffic control, and posted closure or restriction signs.
- Check the current state department of transportation notice for the road or structure.
- Ask the destination or local authority about the final access road.
- Use the RV-specific navigation app to calculate a new route with the correct profile.
- Use a paper road atlas to understand the wider road network if the digital route keeps repeating the same error.
Don’t make a sudden turn because a voice instruction changes at the last moment. Continue to a safe spot where the vehicle can stop without blocking traffic. Then, review the available options.
Recognize signs of an incomplete route database
A route database may be incomplete when it sends an RV toward a road marked closed. It might ignore a visible clearance warning or route through a local restriction. Repeatedly directing the vehicle back to a road that can’t fit the vehicle is also a sign. These signals call for a source check rather than blind compliance.
Temporary restrictions create special problems because they can appear after a map update or before a database records them. Construction zones can change lane width, turn geometry, and access to fuel stations or rest areas.
Plan for cellular service loss
Cellular service can disappear in rural areas, mountain corridors, tunnels, and border regions. Offline maps, a paper road atlas, saved campground instructions, and written contact details keep the trip moving when live data isn’t available.
Download the route before departure and confirm that the saved map shows the entire area, not just a short section around the starting point. Keep the RV profile and destination details available without an internet connection.
How often should RV route information be checked?
Check RV route information before every major departure. Do so after any vehicle setup change, or when weather, construction, ferry plans, border crossings, or seasonal access could influence the trip. Map updates alone don’t replace a fresh review of vehicle dimensions and official road conditions. That’s a concrete point to keep in mind.
Before the trip
- Confirm the RV’s current height, width, length, and loaded weight information.
- Review the main route and each final approach.
- Check state transportation updates, closures, restrictions, and construction.
- Confirm ferry, border, campground, and special-access instructions.
- Save offline maps and prepare the paper road atlas.
During the trip
Recheck the route after a major stop, weather change, or unexpected delay. A closure ahead might make the planned fuel stop or overnight location unreachable. Detours can introduce roads that weren’t part of the original screening, so reviewing the route again is smart.
Review the next segment before leaving a safe stopping place. Do not wait until a narrow junction or low-clearance warning forces a decision.
Account for extra planning costs
RV navigation can involve costs for map updates, mobile data, printed maps, ferry reservations, tolls, and route changes. The total depends on the services and crossings used. Record those expenses before finalizing the trip budget to stay accurate.
Map updates and mobile data are planning tools, not proof that a route is safe for the vehicle. Printed information remains useful if service fails. Official road updates are necessary when conditions change.
Keep the route profile current
Update the route profile after adding roof equipment, changing a tow vehicle, attaching a trailer, carrying a motorcycle, or loading items that affect the vehicle’s travel condition. Recheck the profile before a trip if the RV has been modified or the towing setup has changed.
Navigation accuracy depends on accurate vehicle information and current road information at the same time. A correct map cannot compensate for an incorrect vehicle profile, and a correct profile cannot compensate for an outdated closure database.
The Bottom Line
Good RV driving directions combine a complete vehicle profile with route checks covering the main highway, local approaches, and current restrictions. Use RV-specific navigation as a planning aid. Then verify clearance, weight limits, road conditions, ferries, borders, and campground access through official updates, posted signs, and offline backups.
The safest route is one that fits the RV, the towing setup, the road conditions, and the driver’s comfort level from departure to final entry.
Frequently Asked Questions
How do RV driving directions account for height, length, width, and weight?
RV driving directions only account for those limits if the navigation profile has accurate info. Enter the full travel condition, including roof equipment, mirrors, trailers, tow vehicles, and loads when relevant. Check the route for clearance, weight, width, turning space, and road restrictions, then verify critical limits through official transportation updates and posted signs.
Why did my navigation app send my RV onto a road or bridge it could not use?
Navigation databases can be outdated, incomplete, or based on a car profile instead of the RV’s real dimensions. Temporary restrictions might appear before a map records them. Follow posted warnings and closures, stop safely, check the state transportation agency, and rebuild the route after entering the correct vehicle profile.
Should I trust an RV GPS, a general navigation app, paper maps, or campground directions?
Use each source for a different purpose. RV-specific navigation can screen routes using vehicle data, general navigation can provide broad orientation and traffic information, paper maps provide offline context, and campground directions can clarify the final entrance. None should override current closure signs, transportation updates, or restrictions posted on the road.
How can I plan RV driving directions when cellular service is unavailable?
Download offline maps before leaving dependable service. Save the destination, campground instructions, ferry details, border info, and alternate stops. Carry a paper road atlas and keep the vehicle profile written down. Offline tools don’t show current closures, so check official road info before leaving and reassess when service returns.
How do I verify the final approach to a campground?
Trace the route beyond the property address and check the last turns, bridge warnings, narrow sections, gates, grades, and entrance geometry. Confirm the right access point with the campground, especially if the map pin sits near multiple roads. A campground might provide a safer approach than the route from a general navigation app.