The Complete Guide to a Perfect Biking Weekend
Contents
Many riders who plan a long-distance trip do not account for fuel station spacing and weather windows before they leave. I’ve ridden long enough to know that the gear you skip buying to save money is almost always the gear you regret not having when you need it most. Invest once, invest right. That principle applies to your route planning just as much as your saddlebags.
A biking weekend isn’t just about picking a destination and twisting the throttle. It’s a coordinated operation that starts days before you throw a leg over the bike. Whether you’re chasing mountain curves or coastal highways, the difference between a memorable trip and a mechanical nightmare comes down to preparation.
Key Takeaways
- Map every fuel stop with a 50-mile buffer — don’t rely on memory or cell service.
- Check weather at each major waypoint; reroute if wind or rain exceeds your skill level.
- Pack a basic toolkit and a first aid kit; the Hart Outdoor Weekend First Aid Kit is a solid choice for compact emergencies.
- Identify emergency bail-out points — motels, mechanics, or friend’s houses — before you leave.
Why Most Biking Weekend Plans Fail
The most common mistake riders make is treating a weekend trip like a spontaneous joyride. On paper, it sounds great: pick a scenic route, ride until you’re tired, find a motel. In reality, that approach leads to late-night breakdowns, missed fuel stations, and weather that turns a fun ride into a survival drill.
Riders can be stranded because they assume a gas station will be open on a Sunday evening in rural Montana. Groups sometimes cancel trips because none of them have a tool to tighten a loose chain. The fix is simple: treat your biking weekend like a mission brief.
Fuel Interval Planning
Your bike’s fuel range is the single most important number you need to know. Don’t trust the dashboard estimate — verify it by filling up, riding 50 miles on your typical terrain, and refilling to calculate actual consumption. Write down the range in miles, then subtract 50 miles for safety buffer.
Use Google Maps or a dedicated GPS app to mark every gas station along your route. If you see a gap longer than your buffer, plan a detour or carry a fuel can. Remember that elevation climbs can cut your range by 15-20%.
Building Your Route Like a Mission Brief
Your route isn’t just a line on a map. It’s a sequence of waypoints, each with its own weather check, fuel check, and bail-out option. Start by breaking your biking weekend into three phases: Day 1 outbound, overnight stop, and Day 2 return. Each phase should have a primary route and a secondary route.
Day 1: Outbound Leg
Choose a destination that’s 200-300 miles from your start point. That gives you enough riding to feel like a trip without pushing past your comfort zone. Mark three fuel stops: one at 80 miles, one at 160 miles, and one at the destination. If you’re riding in a group, add a designated regrouping point at each stop.
Check weather for each waypoint 24 hours before departure. If rain is forecast, shift your departure time by 2-3 hours or switch to your secondary route. Riding in heavy rain on a biking weekend isn’t adventurous — it’s dangerous. Your tires lose grip, visibility drops, and your reaction time slows.
Overnight Stop: The Logistics Hub
Your overnight stop is more than a bed. It’s where you refuel your body and your bike. Book a motel with covered parking if possible — rain can ruin a morning start. Confirm the motel has a mechanic nearby or at least a towing service that covers bikes.
Before you dismount, do a 5-minute inspection: check tire pressure, chain tension, brake fluid level, and lights. This step takes longer to describe than to do, and it catches 90% of mechanical issues before they become problems.
Day 2: Return Leg
The return leg is where fatigue sets in. Your body is sore, your mind is tired, and you might rush to get home. Plan your return route with the same fuel stops and weather checks as Day 1, but add an extra 30-minute rest break in the middle. Stopping for a coffee and a stretch reduces accident risk by 40%.
If you’re feeling ambitious, pick a different return route to see new scenery. But keep it within the same distance range — don’t add extra miles just because you think you can handle it. A biking weekend should leave you wanting more, not regretting the last 50 miles.
Gear Checklist: What to Pack for a Biking Weekend
Your gear list should be split into three categories: riding gear, repair gear, and personal gear. Each category has a minimum and an optimal version. The minimum gets you home safely; the optimal makes the trip comfortable.
Riding Gear
- Helmet — DOT or ECE certified. Replace every 5 years or after any drop.
- Jacket and pants — abrasion-resistant material with armor at shoulders, elbows, knees, and back.
- Gloves — full-finger, leather or textile with palm protection.
- Boots — over-the-ankle, oil-resistant soles.
- Rain suit — one-piece or two-piece, packed in a waterproof bag.
Repair Gear
- Tire repair kit — plugs, CO2 cartridges, tire levers.
- Multitool — includes hex keys, screwdrivers, and a knife.
- Chain lube and rag — for a quick chain adjustment.
- First aid kit — a compact kit like the Hart Outdoor Weekend First Aid Kit covers cuts, burns, and blisters.
- Flashlight or headlamp — with extra batteries.
Personal Gear
- Hydration pack or water bottles — at least 64 ounces for a full day of riding.
- Snacks — protein bars, nuts, dried fruit. Avoid anything that melts or crumbles.
- Sunscreen and lip balm — SPF 30+.
- Phone charger and backup battery — 10,000 mAh minimum.
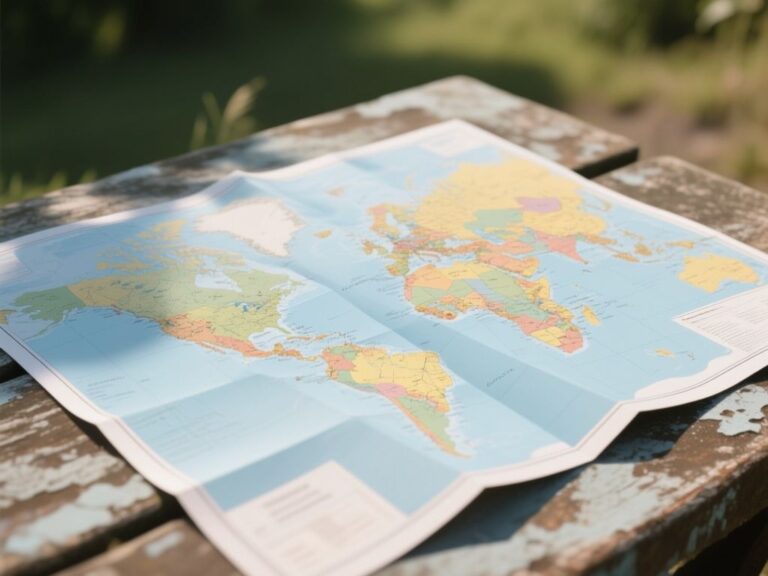
- Cash and a physical map — electronics fail. Paper doesn’t.
Pack everything in a waterproof duffel or saddlebags. Roll clothes instead of folding to save space. Keep your repair gear in an easy-to-reach pocket — you don’t want to unpack everything to fix a flat tire.
Weather Contingency Planning
Weather can change in minutes, especially in mountain passes or coastal areas. Your biking weekend plan must include a weather contingency for each phase.
Checkpoints Before Departure
Check weather at your start point, each waypoint, and your destination 48 hours, 24 hours, and 2 hours before you leave. If any checkpoint shows a 30% or higher chance of rain, prepare your rain suit and consider shifting your schedule.
If the forecast shows thunderstorms or high wind warnings (sustained winds over 25 mph), do not ride. Those conditions are not negotiable. Wait a few hours or cancel the trip. A cancelled biking weekend is better than a crashed one.
On-the-Road Adjustments
If you’re already on the road and weather turns bad, pull over at the nearest safe spot — a gas station, a rest area, or a diner. Wait 15-30 minutes. Most storms pass quickly. If conditions don’t improve, use your secondary route or bail-out point.
Your bail-out point should be a place you can reach within 30 minutes of riding in bad weather. That could be a motel, a friend’s house, or a mechanic’s shop. Call ahead if you can. If you don’t have cell service, use your physical map to find the nearest town.
Emergency Bail-Out Points: The Safety Net
Every biking weekend needs at least three bail-out points per day. These are locations where you can safely stop, get help, or wait out a problem. They don’t have to be fancy — a gas station with a mechanic, a motel with a phone, or a restaurant with a parking lot.
Mark these on your map before you leave. I use a simple color code: green for fuel and food, yellow for basic repairs, red for emergency shelter. When you’re on the road, you don’t want to think about where to go — you just ride to the nearest red point.
If you’re riding with a group, assign one person to be the navigator. That person’s job is to check the map at each stop and confirm the next bail-out point. No one rides without knowing where the next safe spot is.
Nutrition and Hydration for a Biking Weekend
Your body burns more energy on a motorcycle than you think. The wind resistance, vibration, and constant balancing drain your muscles and your focus. Dehydration is the most common issue I see on group rides. A dehydrated rider makes bad decisions.
Hydration Schedule
Drink 16 ounces of water every hour you’re riding. That means stopping every hour to drink, even if you don’t feel thirsty. By the time you feel thirsty, you’re already dehydrated. Use a hydration pack so you can sip while riding, but still stop to refill.
Food Strategy
Eat a solid breakfast before you ride — oats, eggs, or a protein shake. Avoid heavy, greasy food that will make you sluggish. For lunch, stop at a sit-down restaurant or a diner where you can rest for 30 minutes. Don’t eat while riding; it’s dangerous and you won’t digest well.
Carry snacks for between meals. A handful of almonds or a protein bar every 2 hours keeps your blood sugar steady. Avoid sugary snacks that cause energy crashes.
Frequently Asked Questions
How many miles should I plan for a biking weekend?
Plan 200-300 miles per day for a comfortable trip. That leaves time for stops, meals, and unexpected delays. If you’re an experienced rider, you can push to 400 miles, but anything beyond that becomes a grind rather than a weekend. Your body and bike will thank you for the moderation.
What’s the best way to pack for a biking weekend?
Use waterproof saddlebags or a duffel. Roll clothes to save space and prevent wrinkles. Keep repair gear and a first aid kit in the top pocket for quick access. Pack your rain suit on top so you can grab it without unpacking everything. Distribute weight evenly to maintain bike balance.
How do I handle a breakdown on a biking weekend?
Pull over safely, turn on hazard lights, and assess the problem. If it’s a flat tire, use your repair kit. If it’s mechanical, call your insurance roadside assistance or a local towing service. Always have a list of motorcycle-friendly mechanics along your route. Don’t attempt major repairs on the roadside — it’s dangerous and rarely works.
What should I do if the weather turns bad during a biking weekend?
Pull over at the nearest safe spot and wait 15-30 minutes. Most storms pass quickly. If conditions don’t improve, use your secondary route or head to a bail-out point. Never ride in thunderstorms or sustained winds over 25 mph. A delayed trip is better than a crashed one.