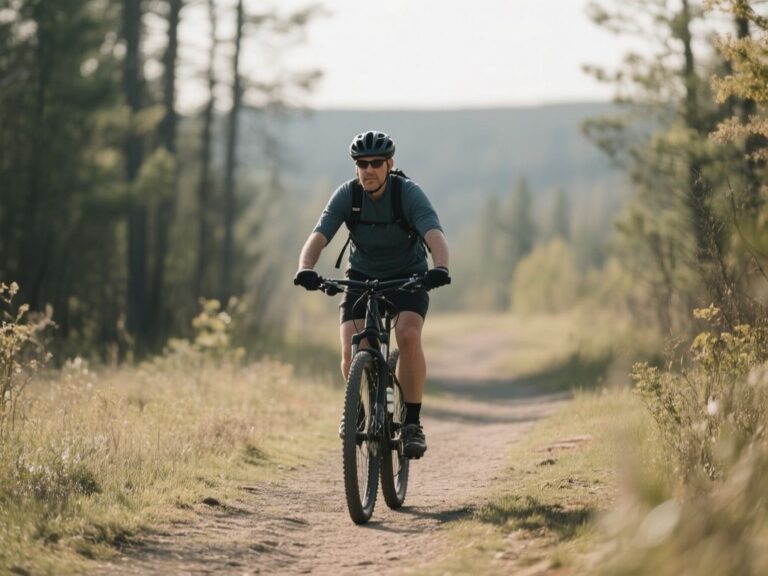
MTB Bike Ride Explained: Tips for a Better Experience
Contents
Can a short trail demand more from a rider than a longer road route? Absolutely. An MTB ride should be judged by terrain, technical demands, climbing, and remoteness rather than distance alone. A short rocky route can require more skill and preparation than a longer smooth one. The key difference is between riding smoothly within control and just getting through obstacles. Bike setup, body position, braking, and line choice all serve traction and control. This is the standard for an MTB bike ride, not a glossy difficulty label or a gear list padded with unnecessary items.
Start with the trail surface and the consequences of a mistake. A route with loose rock, roots, steep grades, exposure, poor weather, or limited exit points can be unsuitable even when the map makes the distance look modest. Check the actual route conditions before heading out. The MTB basics guide for a first ride can help with the vocabulary, but the rider decides based on what they see.
Key Takeaways
- Choose a trail by technical grade, steepness, surface, weather, exposure, climbing, and remoteness rather than distance alone.
- Inspect tires, brakes, drivetrain, wheels, and suspension before leaving, then carry water, repair tools, inflation equipment, and navigation.
- Use a balanced body position, controlled braking, and deliberate lines so the bike stays beneath you instead of merely surviving obstacles.
How to Choose an MTB Bike Ride That Matches You
Read the route beyond its distance
Distance tells you how far the wheels travel. It doesn’t reveal how often you’ll stop, how much climbing is involved, how rough the surface is, or how tough it might be to retreat if weather turns bad. A route map should be read alongside its published grade, surface description, elevation profile, exposure, and remoteness.
Technical difficulty can make a short mountain-bike trail unsuitable for a rider who is comfortable on smooth roads. That’s why a route described as short might still require careful line choice, repeated dismounts, or more prep than a longer gravel ride.
- Surface: Smooth dirt usually asks for less precise wheel placement than loose rock, embedded rock, wet roots, sand, or deep mud.
- Steepness: A steep climb can raise the physical demand, while a steep descent increases the need for braking control and body positioning.
- Exposure: Narrow edges, drop-offs, and exposed traverses make a mistake more serious even if the riding surface is firm.
- Weather: Rain can change grip, visibility, and trail condition. Heat, cold, or wind can also alter how long a rider can remain comfortable and controlled.
- Remoteness: A trail far from a road or reliable exit requires more water, navigation, mechanical preparation, and conservative decision-making.
Match the trail to skill and fitness
Skill and fitness are separate filters. A rider might have enough climbing strength for a route but lack the braking and cornering control needed for its descent. Another rider may handle technical ground well but struggle to maintain steady effort on a long climb.
Use the published grade as a starting point, not a promise. Ratings can differ between trail systems, and promotional descriptions often flatten important differences. Read the route notes for the surface, technical features, steep sections, and escape options. If those details are missing, treat the uncertainty as part of the difficulty.
A practical progression looks like this:
- Beginner: Choose a route with a clear surface, manageable climbing, limited exposure, and frequent opportunities to stop. Practice starting, stopping, shifting, braking, and cornering before adding rougher ground.
- Intermediate: Add roots, rocks, tighter turns, and longer climbs one feature at a time. Leave room to slow down before technical sections rather than entering them at a speed you cannot control.
- Advanced: Consider how surface changes, steepness, exposure, weather, and remoteness combine. Advanced riding still depends on choosing a line that leaves an exit, not on forcing every feature.
For regional planning, the guide to bike trails in Ogden, Utah shows why the trail setting matters as much as the route name. Use any destination guide as a starting point, then check the current map, access info, and conditions before heading out.
Plan your pace before the climb starts
Long climbs should be ridden at a pace that leaves control for the technical sections ahead. Start conservatively, use a gear that allows a smooth pedal stroke, and don’t treat the first climb as a pride test. Short stops can be helpful if they prevent rushed decisions later.
Technical sections often punish fatigue more than speed. Keep enough energy for the return, the descent, and unexpected delays. A rider who reaches the difficult section already tense and depleted has fewer options.
How to Prepare the Mountain Bike Before an MTB Ride
Complete a pre-ride inspection
A pre-ride inspection should include tire condition, brake function, drivetrain operation, wheel security, and suspension leaks. This isn’t unnecessary ceremony. Finding a small problem beside the car is easier than dealing with the same issue deep in a remote trail.
- Tires: Check the tread and sidewalls for cuts, excessive wear, embedded debris, or a visibly low casing. Bicycle tire sidewalls can show a pressure range of 100 to 1,400 kPa, or 15 to 200 psi; use the marked range as a boundary and adjust only with a clear reason based on the trail, rider, and bike setup.
- Brakes: Squeeze both levers while the bike is stationary. The levers should produce firm braking action, and the rotors should not show obvious damage or contamination. Hydraulic disc brakes need attention if the lever feel changes or braking becomes inconsistent.
- Drivetrain: Turn the cranks and shift through the usable gears while the bike is supported. Listen for skipping, grinding, or a chain that refuses to move cleanly across the cassette.
- Wheels: Check that both wheels sit securely in the frame and fork. Spin them and look for a visible wobble, damaged rim, or contact with the brake system.
- Suspension: Inspect the stanchions and shock area for oil or dirt buildup that suggests a leak. Confirm that the fork and rear shock move without an unexpected rough spot or loss of control.
- Contact points: Check the handlebar, stem, saddle, and pedals for movement. A loose control point can change how safely the bike responds on rough ground.
A mountain bike with a leaking suspension component should not be treated as ready simply because the wheel still turns. Suspension affects how the tires follow uneven ground, so a leak or unusual movement deserves attention before the route begins.
Understand suspension without letting it inflate the route choice
A rigid bicycle has no suspension. A hardtail only has front suspension, while a dual-suspension or full-suspension bike has suspension at both ends. These labels describe the bike’s layout; they don’t turn a difficult trail into an easy one.
A suspension fork helps the front wheel track uneven ground, while a rear shock allows the back of a full-suspension bike to respond to rocks and roots. The goal is better contact and control on rough sections when the rider stays balanced. Suspension can’t replace a good line, controlled speed, working brakes, or the skill to stop.
Some suspension setups use a unified rear triangle, which keeps a direct connection between the rear axle and bottom bracket. A Monolink uses three pivot points and the shock’s sliding action to create a fourth degree of freedom. These design terms matter when reading a bike’s technical description, but they shouldn’t distract from the checks that matter most for the ride: movement, leaks, braking, wheel security, and drivetrain operation.
Prepare what you will carry
Carry water, a bike repair kit, a pump or inflator, basic tools, and a way to get back from the trail. The contents depend on the route and bike, but the purpose is always the same: fix a small problem or make a safe retreat without relying on an immediate vehicle or phone signal.
- Water and a way to carry it.
- A repair kit suited to the bike’s wheels and drivetrain.
- A pump or inflator that fits the valve.
- Basic tools for tightening and adjustment.
- A navigation method with the trail map available offline when possible.
- A mountain-bike helmet and protective equipment appropriate to the route.
The U.S. Consumer Product Safety Commission publishes consumer safety information for bicycles and protective equipment, so its guidance is a useful reference when checking general riding safety. ASTM International develops voluntary consensus standards used across many products and activities; its published material can help readers understand why a visible standard mark should be checked rather than assumed.
How to Ride Rough Ground, Climbs, and Descents
Build control through body position
On level rough ground, keep your body relaxed enough for the bike to move beneath you. Look beyond the immediate obstacle. A rigid upper body can make roots and rocks feel harsher because you resist every movement. A stable lower body helps keep the tires loaded without locking you into one position.
On a descent, lower your center of mass by bending the elbows and knees. Keep your weight balanced between the wheels and move your hips as the slope and surface change. Avoid hanging far behind the saddle as a default response to steepness; that can reduce front-wheel control and make cornering less precise.
Body position gives a mountain-bike rider room to respond when the surface changes. The goal isn’t a fixed pose but a balanced position that keeps both tires useful and the controls accessible.
Choose a line before the obstacle
Look through a turn and scan for the surface that offers the most predictable grip. Sometimes, a line around a rock is safer than going over it, while a square approach to a root might be more controlled than striking it at an angle. The correct choice depends on the feature, but late decisions often lead to rushed braking and poor balance.
Keep your eyes moving. First, identify the broad path, then look for the next surface change, and finally, find the exit point. If the line becomes uncertain, slow down before entering it. Dismounting is a valid riding decision if the consequences of a mistake outweigh your current control.
Use brakes with purpose
Brake before a corner or steep feature, then release or reduce braking as traction becomes scarce and the bike needs to roll. Both brakes matter, but abrupt front-brake use on loose or steep ground can upset the front wheel. Dragging the rear brake can help manage speed, but locking the rear wheel reduces its ability to follow the line you’ve chosen.
Use short, measured inputs instead of a panicked squeeze. Keep your fingers ready, look where you want the bike to go, and decide your speed before hitting the most technical part of the descent.
Brake control is key to safe descending because your speed affects how much time you have for line choice and correction. Protective gear can’t make an uncontrolled descent safe, so ride within your ability to stop, turn, or step off if needed.
Climb with traction in mind
On a loose climb, sit in a position that keeps the rear tire engaged without making the front wheel wander. Smooth pedal pressure helps preserve traction. If the rear wheel spins, ease up on the effort and adjust your line rather than forcing the pedals harder.
Standing can help with short grade changes. But doing it repeatedly on a long climb wastes energy. Shift before the slope gets too steep for a clean gear change. Keep enough attention for the descent that follows.
Know how an MTB ride differs from road and gravel riding
A road bike ride usually emphasizes sustained movement over a predictable paved surface. Gravel riding introduces loose surfaces and route variability. Still, many gravel routes allow a wider line and more continuous forward motion. Mountain biking focuses more on obstacle reading, traction changes, braking, body movement, and line choice.
That difference affects preparation. A road route might prioritize distance as the main concern. An MTB route demands closer attention to surface, grade, escape options, and technical fatigue. A gravel bike can handle dirt well, but a route with rocks, roots, steep turns, or narrow exposure needs to be judged by control, not just bike capability.
What to Do During a Flat, Mechanical Problem, or Weather Change
Deal with a flat methodically
Stop in a stable place away from the riding line. Inspect the tire before removing anything so you can identify a thorn, cut, or object that may still be present. Use the repair kit and pump or inflator to restore a usable tire, then check that the bead and valve are seated and that the wheel turns without rubbing.
Tubeless tires can cut down on the need for inner-tube repairs in some puncture cases. But they require compatible tires, rims, valves, and sealant. Sealant can dry out over time, so it needs regular inspection rather than a one-time setup. An ignored tubeless system isn’t automatically ready for a remote trail.
Tubeless sealant needs inspection because dried sealant cannot perform the same job as usable liquid sealant. Check the system before a significant ride and carry a backup plan for damage that sealant cannot close.
Manage a drivetrain or brake problem
If the chain skips, stop pedaling hard and inspect the chain, derailleur, and cassette for debris or damage. Don’t force a shift if it makes the noise worse. If brakes feel weak, inconsistent, or damaged, slow down and assess if there’s a safe route out. Walking the bike might be the best choice.
Basic tools can fix a loose component. But tools don’t make a damaged part safe. Planning a remote route means expecting that a repair might only allow a slow retreat, not full recovery to normal riding.
Respond to changing conditions
Wet roots, mud, loose soil, and changing light can quickly make a trail more difficult. Turn around before the trail becomes too dangerous, especially when there’s exposure or no easy exit. Trail etiquette is important: slow down for walkers and other riders, announce your approach where needed, and avoid widening the trail to escape a poor line.
After a muddy ride, rinse loose dirt off without pushing grit into bearings or suspension seals. Use appropriate bike-cleaning tools to clean the frame and drivetrain. Dry the chain and moving parts before applying the lubricant designed for the component and conditions. Check brake surfaces for contamination and look for cuts, loose hardware, or suspension leaks again.
Cleaning a muddy mountain bike protects the drivetrain from abrasive dirt and makes new damage easier to find. Do not treat washing as a cosmetic task; the inspection after cleaning is part of maintenance.
What Ongoing MTB Riding Really Costs
Separate access costs from maintenance costs
The cost of staying active on a mountain bike comes from more than trail access. Repairs, tires, sealant, tools, transport, and replacement parts all belong in the plan. A route with a rough surface may increase tire wear, while frequent muddy riding may demand more cleaning and drivetrain attention.
Bicycle tires usually last about 1,500 to 5,000 kilometres or 900 to 3,000 miles before needing replacement. But the exact point depends on visible wear, cuts, riding surface, and setup. Inspect tires regularly instead of relying solely on a calendar. The pressure marked on the sidewall is a guide, not a guarantee that every pressure within that range suits every trail.
Tubeless systems need sealant inspection and occasional replacement. Full-suspension bikes have more moving parts than rigid or hardtail bikes, so routine checks should include the fork, rear shock, and pivot points. Don’t see this as a shopping contest. A simple bike that’s maintained and ridden within its limits is more useful than a complicated setup that’s neglected.
Use a practical maintenance routine
- Before each ride: Check tires, brakes, drivetrain, wheels, suspension leaks, and control points.
- After a muddy ride: Remove dirt, inspect the drivetrain and brake surfaces, dry the bike, and check for damage.
- Before a remote route: Confirm the repair kit, inflation method, navigation, water, and route exit options.
- During tire maintenance: Check sidewalls, tread wear, valves, rims, and tubeless sealant if the system uses it.
- When a fault appears: Repair it before the next demanding route rather than hoping a rough trail will expose no further weakness.
Keep a simple record of repairs, tire changes, sealant checks, and trail access costs. The goal isn’t precise accounting for its own sake. It helps you see which parts of your riding cause recurring expenses and prevents a small issue from turning into an expensive recovery.
Frequently Asked Questions
How do I choose an MTB bike ride that matches my skill and fitness?
Check the published grade alongside surface, steepness, exposure, weather, climbing, and remoteness. A short route with loose rock and steep descents might require more control than a long, smooth trail. Pick a trail where you can stop, turn around, or walk difficult features without creating safety issues. Your fitness covers climbing; your skill covers braking, line choice, and balance on technical ground.
What should I check on my bike before an MTB ride?
Inspect tire condition and pressure markings. Test both brakes. Shift through the drivetrain and confirm wheel security. Look for suspension leaks around the fork and rear shock. Check the handlebar, saddle, pedals, and other control points for movement. Carry water, a repair kit, a pump or inflator, basic tools, and a navigation method that can guide you back if the trail becomes impassable.
When are tubeless tires useful for mountain biking, and what maintenance do they need?
Tubeless tires can be helpful on rough terrain where punctures might happen. But the tires, rims, valves, and sealant must be compatible. Sealant can dry out over time, so inspect it regularly rather than assuming it’s still active. Carry a backup repair method because a large cut or damaged rim might not seal with sealant alone.
For a broader look at how surface changes affect the ride, read what changes the result on an East Coast bike ride in 2026. The same idea applies everywhere: judge the ground beneath the tires, consider the route’s demands, and think about how far help might be.