Model Train Scenery: Complete Guide to Realistic Layouts
Contents
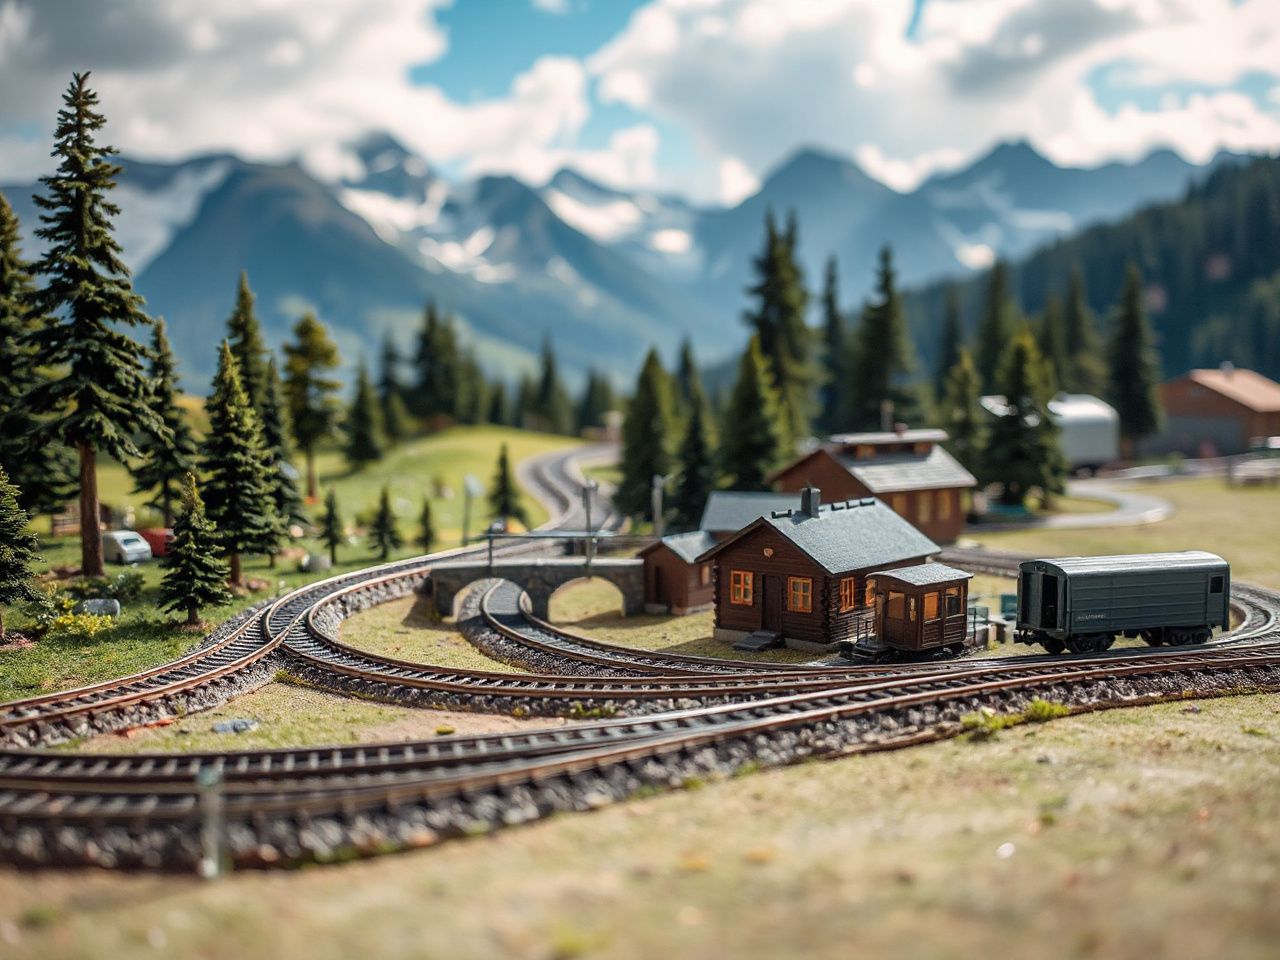
Scenery is not decoration. On a well-built layout, scenery is the operating environment itself, and it deserves the same planning discipline as any other subsystem of the railroad.
That is the first thing to know about building convincing model train scenery. The most common beginner error is treating scenery as an afterthought rather than a structured process. The real distinction between a convincing scene and one that registers as fake comes from multiple thin layers and varied textures applied in sequence, not a single thick pass of any one product. Study real landscapes, respect scale proportions, and never rush the drying time between those layers.
If you are still gathering rolling stock while planning scenery, our breakdown of the best Lionel train sets of 2026 runs through the entry points worth considering before you pour a single grain of ballast.
Key Takeaways
- Build scenery in strict layers: sealed foam, plaster landforms, base ground cover, fine texture, then vertical details — skipping any step produces flat, fake-looking terrain.
- Test every adhesive and water product on scrap foam first; several common solvents dissolve extruded polystyrene on contact.
- Ballast should be worked in three passes: dry placement, glue application, then reshaping — a single pour always looks plastic.
- Scale discipline matters: HO-gauge grass fibers will destroy the illusion on an N scale layout because each blade reads as a foot-tall stem.
The Order of Operations: Sequence Beats Enthusiasm
Any model train scenery project fails or succeeds based on sequence, not enthusiasm. You cannot glue ballast before the track bed is aligned. You cannot apply ground foam before the plaster terrain has fully cured. Treat the scenic layer like a route survey: subsurface, hardscape, ground cover, then vertical structure, in that order, without exceptions.
Stage Zero: Survey the Reference Landscape
Before cutting foam, spend real time looking at the landscape you intend to model. A mountain pass in the Rockies erodes differently than a Welsh valley or a Swiss alpine meadow. Watch how water carves drainage lines, where vegetation clusters versus thins out, and how the horizon line breaks. Photographs work best — your phone camera is the single most useful scenery tool you own.
This is also where scale discipline starts. The National Model Railroad Association publishes standards for scales and clearances that dictate how tall your trees, grass tufts, and structure doors should be relative to the track gauge. If you model in N scale at 1:160, a 25-foot prototype tree is roughly 1.9 inches tall — a figure that should govern every material choice downstream. HO scale at 1:87 doubles that figure, which is why the same grass flock reads completely differently between the two scales.
If your track plan is still undecided, our guide to the best electric train sets for 2026 covers starter packages that leave room for scenery expansion rather than locking you into a rigid oval.
The Layer Stack: Five Passes, No Shortcuts
Think of scenery as five distinct applications, each one drying completely before the next touches it:
- Structural base — extruded foam sheet, cut and stacked to elevation.
- Terrain shell — plaster cloth and rock castings applied over sealed foam.
- Ground cover base — an adhesive coat with soil-toned fine flock or dust covering every visible surface.
- Texture and vegetation — static grass, coarser flock, clump foliage, and weeds in varied densities.
- Vertical elements — trees, structures, signal masts, and telegraph poles planted last.
That is the sequence. Skip the base layer and static grass will adhere unevenly to raw foam. Skip the plaster layer and rock castings will float above the landscape instead of sitting in it. Skip the ground cover base and every subsequent layer will show bare patches through the gaps.
Terrain Foundation: Foam, Sealant, and the Cliff That Earns Its Height
The terrain base is where model train scenery starts to look three-dimensional instead of painted. Extruded polystyrene foam sheets — the pink or blue rigid boards sold as insulation — are the standard substrate for terrain because they carve cleanly and accept plaster cloth after sealing.
Cutting and Shaping Foam
Use a hot wire cutter for clean slices and a surform rasp to knock down edges into rolling contours. Avoid sanding foam with coarse paper unless you want a snowdrift of white dust coating the entire benchwork. A sharp utility knife works in a pinch, but it crushes cells and leaves ragged shoulders that will read through the plaster.
This is also where you map drainage lines. Real hills direct water along predictable paths, and those paths become creeks or culverts or dry washes on the layout. Carve shallow channels into the foam now, even if they are only an eighth of an inch deep. Ground cover and ballast will eventually disguise the hard edges, but the watercourse needs to exist underneath.
The Sealant Rule: One Coat Before Any Plaster
Plaster cloth contains water, and raw extruded foam repels water without absorbing adhesive. Worse, some plaster products contain accelerants or trace solvents that can attack the foam surface. The fix is simple and non-negotiable: apply a continuous sealing coat of flat latex house paint or shellac before any plaster cloth touches the foam.
A neutral earth tone works perfectly and costs almost nothing, since you need only a thin skin. This sealant layer produces three effects: it bonds the plaster mechanically, it prevents any chemical reaction between plaster chemistry and polystyrene, and it color-blocks the surface so that any small plaster chip or crack in later stages does not expose vivid pink or blue foam underneath. Never skip this step on raw foam — the result of doing so is a landscape that peels away in sheets.
Plaster Cloth: The Shell That Carries Weight
Plaster cloth is exactly what it sounds like — gauze infused with plaster compound. Cut it into strips, dip each strip in water, and lay it across the sealed foam in overlapping passes. Two layers are the floor for a flat landscape; three to four layers across any cliff face or vertical cut.
The most important variable here is working time. Plaster cloth begins to set within roughly 10 to 15 minutes of wetting, depending on humidity and temperature. Mix only as many wet strips as you can lay within that window. Build the terrain in sections rather than trying to blanket the entire layout in one session, because the section boundary is where the next batch overlaps seamlessly.
While the plaster cloth is damp but no longer soupy, press rock castings into place. Hydrocal or lightweight rock molds from companies like Woodland Scenics or Noch register far more realistic strata than anything carved freehand with a knife. Press each casting into the wet cloth, blend the edges with a wet brush, and let the whole section cure undisturbed.
Rock Tinting: Dry Brushing Wins Over Paint Coats
A single coat of gray or tan paint on a rock casting produces exactly what you would expect: a gray or tan lump. Real rock shows strata, mineral staining, and weathering along fracture lines. The technique that produces this is dry brushing — loading a brush with a lighter tone, wiping most of it off, and dragging the near-dry bristles across the raised texture.
Start with a dark base wash on the entire rock face, let it dry fully, then dry brush successively lighter tones on top. A pass of raw umber, then a pass of light gray with a hint of cream, builds highlight on the high faces while the crevices stay dark. Two tones and a wash get you 80 percent of the way to convincing rock; the last 20 percent is mineral staining with thinned washes of rust or black along vertical crack lines.
Track Ballast and Ground Cover: The Blend That Hides the Benchwork
Track looks like track until ballast goes down. That moment is when the model stops floating on the plywood and starts running through terrain. Ballast also happens to be the hardest element to get right, because the scale and color have to match both the prototype and the era you model.
Ballast Selection by Scale
Ballast is graded by particle size, and N scale track requires the finest grade available to keep individual stones in proportion to the rails. For HO scale at 1:87, use fine or medium ballast. For N scale at 1:160, use the finest grade available — a medium HO ballast chunk is the equivalent of a boulder bigger than a real cinder block. The color should reflect the prototype: light gray limestone for Midwestern US lines, darker granite ballast for mountain railroading, and brownish quarry ballast for industrial spurs in coal country.
The same rule applies to every texture you layer on later. Ground foam, static grass fiber length, and even the flock on your trees are all scale-specific materials. Check the packaging for a scale designation before you buy, and when a product is unmarked, hold it next to an N scale figure and judge whether each particle could pass as a full-size stone, blade, or leaf at 1:160.
The Three-Pass Ballast Method
Spread dry ballast along the track with a soft brush, pushing it gently between and around the ties. Shape the shoulders — the angled slope that real ballast forms along the outside of each rail — with a small flat tool or brush edge. The shoulder should rise roughly half the height of a tie on each side, sloping outward.
Then apply scenic cement — a diluted white glue or commercially prepared adhesive — with an eyedropper or a fine-tipped squeeze bottle. Wet the ballast completely by capillary action, not by flooding. A drop of liquid dish soap or rubbing alcohol in the glue mix lowers surface tension so the adhesive penetrates between individual grains instead of beading on top.
After the glue has begun to set but is not yet hard — usually 20 to 40 minutes — go back and reshape any ballast that has shifted. This third pass is also where you add small patches of dirt, cinder, or oil stains to break up the uniform gray. Real track is never one shade from one end to the other.
Ground Cover: Soil First, Then the Interesting Stuff
Now you have landforms and a realistic track bed. The next layer is the soil-toned base that covers every square inch of visible foam and plaster. The product category here is ground foam or fine flocking — pulverized foam rubber or dyed sawdust passed through progressively finer screens.
Lay down a base ground cover in earth or soil tones first, adhering it with the same diluted glue technique used for ballast. Cover 100 percent of the terrain, including under areas where you will later add grass or scrub. Nothing screams fake louder than a patch of bare painted plaster peeking through between otherwise convincing vegetation.
Then move to texture variation. The technique that sells ground cover is not one layer of one color but three or four thin passes of different materials in different densities: fine soil flock, then slightly coarser dead-leaf flock in low areas, then static grass in patches where vegetation would actually grow. This is also the moment to consider placement of any diorama-style vignettes — a fallen log, a creek crossing, a foundation from a demolished structure.
Vertical Elements: Trees, Structures, and the Static Grass Illusion
Static Grass: Upright Fiber, Not a Green Carpet
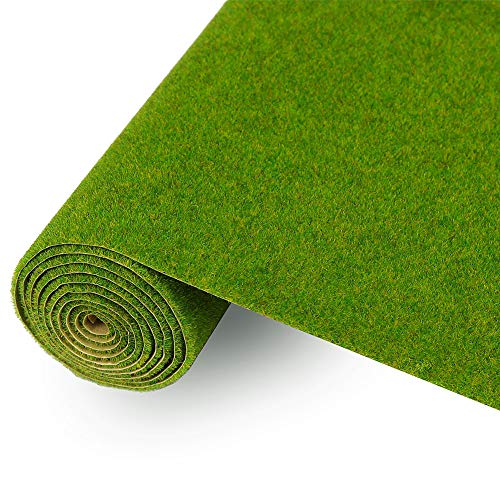
The reason standard foam turf looks like a green carpet is gravity: the fibers lie flat, reflecting a uniform surface. Static grass applicators use electrostatic charge to stand individual synthetic fibers upright as they are applied, which is why the result reads as a meadow rather than a green carpet.
The applicator sends fibers through a charged mesh screen, and the fibers fly toward a grounded surface — typically a pin or wire embedded in the wet glue — landing vertically like hundreds of tiny spears. The outcome is a patch of grass with actual height, depth, and directional variation.
Start with a 2-millimeter grass over the base terrain, then follow with a 4-millimeter or 6-millimeter pass in spots to suggest taller field growth. Vary the concentration. Real grass does not grow at uniform density, and a scattering of fiber patches over dark soil flock reads as natural meadow far more convincingly than a wall-to-wall carpet.
Trees That Earn Their Foliage
The bottle-brush tree is the single biggest tell of an amateur layout. Store-bought trees with a wrapped trunk and a wrapped cylinder of green foam read as exactly what they are: twisted wire with flock glued on. Real trees have structure — trunk, main branches, secondary branches, and only then foliage masses.
The fix is either building armatures from twisted florist wire, or buying bare armature kits from companies like Woodland Scenics, Faller, or Busch and adding foliage in small clumps yourself. Bend the wire armature into a believable branching pattern first, looking at actual tree silhouettes for reference. Apply clump foliage in small pieces to the branch tips, not as a single solid mass. The goal is to see air gaps through the canopy — a solid tree silhouette is a fake tree silhouette, at any scale.
Plant trees after all ground cover is dry, and vary both the species shape and the trunk height. A row of identical trees in a straight line is a shelterbelt, not a forest edge. Break the line, vary the spacing, and place the tallest trees behind the shortest ones to create a layered depth of field. If your layout includes DCC-controlled lighting, position trees to partly obscure light sources from certain viewing angles — shadows moving across terrain are one of the most underused realism tools in the hobby.
Weathering Structures and Rolling Stock
A brand-new plastic depot on a weathered embankment looks like it fell out of a catalog. Weathering is the process of simulating years of sun, rain, soot, and handling in a matter of hours.
Start with an overall dulling wash — a heavily thinned flat black or dark umber — brushed over the entire structure and blotted back. Follow with targeted washes along roof edges, under eaves, and around windows where soot and grime would accumulate in real service. End with a light dry-brushing of the wear points: door handles, stair treads, loading platform edges.
The same logic applies to every vehicle on the layout. Static display pieces get the dulling wash and the wear-point dry brush. Vehicles that sit in active service get a more aggressive treatment — road grime, faded paint, and oil stains at the rail yard end.
Water Features: The Hardest Layer to Sell
Model water fails when it reads as a solid plastic sheet. Real water is translucent, variably deep, and reflects light differently at the edges than in the center. The illusion depends almost entirely on what is underneath.
Pouring Order for Realistic Water
Paint the stream or lake bed before you pour anything. Dark earth in the center fading to lighter soil tones at the edges suggests deeper water in the middle, which is exactly how a pond reads from above. Add patches of dark vegetation under the deepest areas and scatter fine sand along the shore.
Apply the water product — usually a clear acrylic or epoxy-based pour medium — in thin layers rather than a single deep pour. Two or three passes of 1/16 inch each build depth without trapping air bubbles. The first pour creates the base plane; subsequent pours add gloss and the sense of depth. Check the manufacturer’s instructions before using any water product near unsealed plaster or foam, since some pour mediums are solvent-based and will attack those materials.
Shoreline and Surface Detail
The final water pass is where the scene comes alive. While the last pour is still tacky, press small sand or fine soil particles into the shoreline to create a natural wetted edge. If the scene calls for moving water, drag a dry brush across the tacky surface in the direction of flow to create subtle ripple marks before the medium fully cures.
One subtle touch that enhances the entire layout: a thin ring of slightly darker tone at the waterline where moisture darkens the soil. Dry brush this line on after the water has fully cured. If you want full-scale reference for what a convincing rail landscape looks like, our guide to the best European train tours for scenic rail journeys points toward real routes that translate directly into modeling references for terrain, tunnels, and water crossings.
Cost and Material Reality for a Small Layout
A full scenery treatment for a small 4-by-8-foot layout runs between $150 and $400 in materials, depending on how much vinyl track-side scenery, water, tree, and rock product you buy. The foam base is typically the cheapest element at under $40, while static grass applicators, scale trees, and water pour products are the biggest line items.
You can keep costs down by making your own base flock from sawdust dyed with fabric dye, building tree armatures from florist wire, and mixing your own diluted white glue instead of buying scenic cement. The one place not to economize is ballast — cheap ground-up walnut shell ballast looks exactly like ground-up walnut shells under bright layout lighting.
Budget the same way you would route a long motorcycle haul: identify the fixed costs first, then decide which marginal upgrades actually change the visual outcome. A static grass applicator changes the outcome. Expensive pre-made trees often do not, unless you are modeling a specific species at a specific density.
Frequently Asked Questions
What is the best order to build model train scenery so it does not look fake?
The correct order is sealed foam base, plaster cloth terrain shell, rock castings, ballast, base ground cover, texture vegetation, then vertical elements like trees and structures. Each layer must dry completely before the next begins. Skipping the sealing step on raw foam is the single most common cause of peeling terrain, because plaster products can chemically react with polystyrene and fail to bond.
How do I make grass that does not look like a green carpet?
Use static grass applied with an electrostatic applicator, which stands fibers upright instead of letting them lie flat. Vary the fiber length — 2-millimeter base, 4 to 6-millimeter accents in scattered patches — and leave gaps where soil-toned ground cover shows through. Real meadows have uneven density; a uniform green sheet at any scale reads instantly as artificial.
What kind of glue works for model train scenery without melting the foam base?
Diluted white glue, also sold commercially as scenic cement, is the standard adhesive for ballast and ground cover and is safe on sealed foam. Always test any product on scrap foam first. Solvent-based adhesives and some water pour mediums will dissolve extruded polystyrene on contact, which is why sealing foam with latex paint or shellac before scenery work is a mandatory first step.