


You want a great motorcycle route near you and a quick way to find it, whether you crave twisty backroads, coastal views, or a short weekend loop. Use apps and community route sites to search nearby rides, check maps and photos, and pick a route that matches skill level and time available.
The fastest way to find a safe, fun route near you is to use a motorcycle route app or community map that shows nearby tracks, rider ratings, and useful details like distance and road type.
They can edit routes, save them to GPS, and see photos and stats before they start, so choosing a good ride becomes simple and reliable. Local ride groups and event listings also reveal hidden gems and timed meetups that make a solo ride into a social outing.
Key Takeaways
- Use route apps and community maps to find nearby rides quickly.
- Match route choice to skill, time, and road type before heading out.
- Check local groups or events to discover popular and safe routes.
How to Find the Best Motorcycle Route Near Me
Start by checking digital maps for road type and elevation, then compare ride reviews and photos. Talk with local riders to learn about road surface, traffic times, and scenic stop-offs.
Online Mapping Tools
They should use route apps like REVER, Roadtrippers, Detecht, or Google Maps to build and test rides. These tools show turn-by-turn directions, elevation changes, and estimated ride time. REVER and Detecht include community-tracked routes so riders can preview curves and surface quality from others’ logs.
Look at satellite and terrain layers to spot switchbacks, river runs, and steep grades. Save routes offline before leaving cell coverage. Export GPX files to a dedicated GPS or phone app to avoid wrong turns.
Pay attention to user ratings and recent track logs. Recent logs reveal road work or closures. Filter searches by “scenic,” “curvy,” or “back roads” to match riding style.
Local Riding Groups
Local clubs and meetups give first-hand knowledge about road conditions and safety. Many groups post regular ride calendars with start points, pace, and rest stops. Joining a group ride helps a rider learn local etiquette like staggered formation and hand signals.
Ask group members about seasonal hazards—leaf slicks in fall, salt on winter shoulders, or deer in spring. Members often know hidden pullouts, best gas stops, and coffee shops that welcome riders. New riders should request slower-paced rides before attempting long or technical routes.
Clubs may also share offline GPX files and private route notes. Those files often include warnings for gravel patches, washed culverts, or frequent police checkpoints.
Social Media Resources
Social platforms like Facebook groups, Reddit (r/Motorcycles or state-specific subreddits), and Instagram tags offer quick tips and recent photos. Search for phrases like “Ohio rides,” “Columbus motorcycle routes,” or county names to find local posts and route maps. Photos and short videos show road surface and scenic value at a glance.
Use group search and pinned posts to find route collections and GPS files. Post a short question with route start and preferred distance to get tailored suggestions. Verify tips by checking multiple posts or matching with mapping tools before heading out.
Follow well-known local riders and pages for realtime updates on closures or police activity. Screenshot key directions and save them offline, since social posts can disappear or be moved.
Popular Types of Motorcycle Routes
Riders choose routes for scenery, challenge, or elevation changes. Each type favors different bikes, gear, and skills.
Scenic Drives
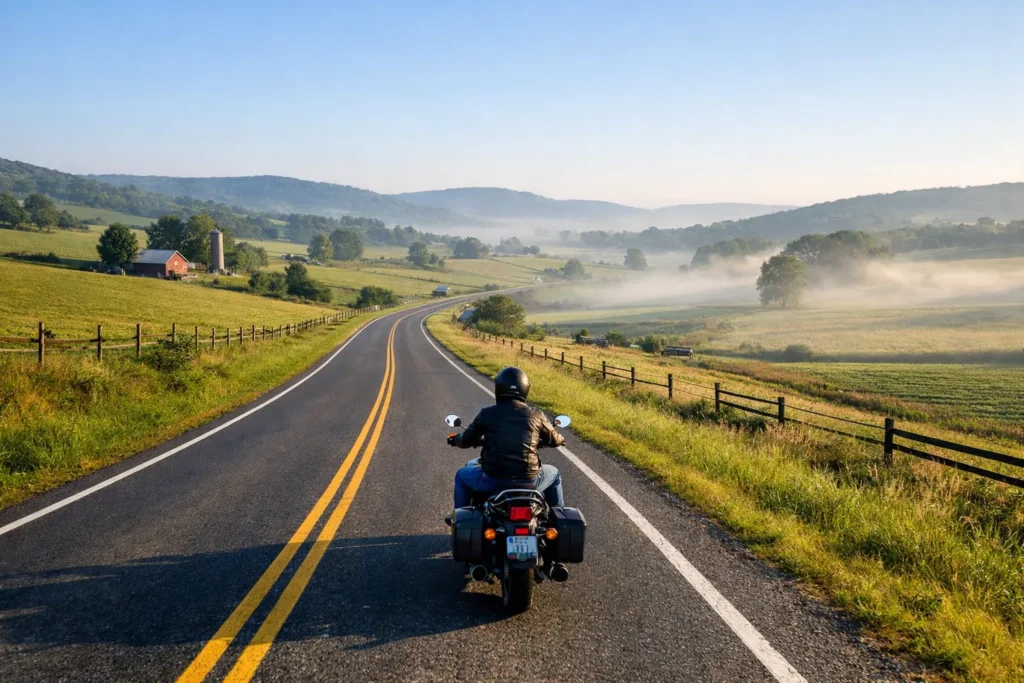
Scenic drives focus on long, open views and steady curves. They often follow lakeshores, coastal roads, or rolling countryside. Riders should expect well-paved surfaces, frequent pullouts, and photo opportunities. Ideal bike: touring or cruiser with luggage options.
Key features:
- Views: lakes, coastlines, forests, farmland.
- Stops: lookouts, small towns, picnic areas.
- Road quality: usually smooth with gentle turns.
Table — Scenic Drive checklist:
| Item | Why it matters |
|---|---|
| Fuel stops every 40–80 km | Prevents running low on remote stretches |
| Designated pullouts | Safe places for photos and rest |
| Light traffic times | Better visibility and less congestion |
They suit riders who prefer relaxed days with time to explore towns and attractions. Comfortable seating and weather layers matter for long, slow miles.
Twisty Roads
Twisty roads deliver a sequence of turns, short straights, and changing camber. These routes test cornering and throttle control without extreme elevation. Ideal bike: sport or standard with responsive handling.
Key features:
- Turns: frequent S-curves and hairpins.
- Pacing: requires active braking and constant line choice.
- Hazards: gravel, fallen leaves, and blind crests.
Table — Twisty Road prep:
| Preparation | Tip |
|---|---|
| Tire check | Ensure good tread and proper pressure |
| Riding partner | Ride staggered for safety |
| Local speed limits | Follow limits and adjust for conditions |
They attract experienced riders seeking flow and skill practice. Caution at intersections and pullouts keeps the ride safe.
Mountain Passes
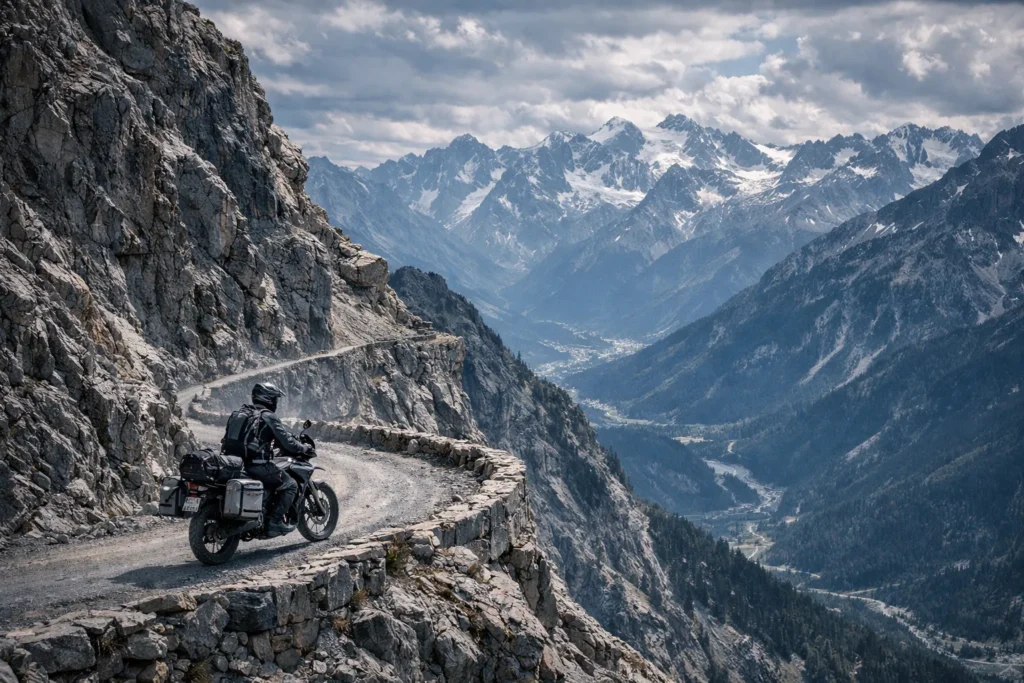
Mountain passes combine steep grades, long sweepers, and short technical sections. Elevation brings thinner air, sudden weather shifts, and tighter safety margins. Ideal bike: dual-sport, sport-touring, or adventure bike with good brakes.
Key features:
- Grades: sustained climbs and descents.
- Weather: rapid changes; fog and temperature drops are common.
- Road features: runoff zones, guardrails, switchbacks.
Table — Mountain Pass essentials:
| Essential | Reason |
|---|---|
| Layered clothing | Temperature can drop 10–15°C with altitude |
| Brake management | Avoid overheating on long descents |
| Emergency kit | Cell signal may be weak; prepare for delays |
They demand strong endurance and planning. Riders should monitor forecasts, pace braking, and allow extra time for slow-moving vehicles.
Safety Tips for Riding Local Routes
Riders should check the forecast, inspect the road surface, and wear the right protective gear before leaving. Planning for rain, potholes, and visibility will cut risk and keep the ride more predictable.
Weather Considerations
They must check temperature, wind, and precipitation for the exact route and time of day. Heavy rain reduces traction and can hide oil slicks; light rain still lowers grip, so slower speeds and smoother inputs are essential. High winds, especially crosswinds near open fields or bridges, can push the bike; riders should lower their profile, move toward lane center, and be ready to countersteer.
Plan rides when temperatures stay above tire operating range; cold tires mean less grip. If storms are possible, delay the trip or choose a sheltered route. For heat, they should hydrate, wear ventilated gear, and take more breaks. For official forecasts and alerts, use the National Weather Service or a reliable local weather app.
Road Conditions
They must scan for potholes, gravel, wet leaves, and painted lines before committing to a line through corners. Approach suspect surfaces early, reduce speed, and avoid sudden braking or sharp steering over them. Watch for road repairs and uneven lanes; ride in the portion of the lane with best traction, which may be the tire track rather than the center.
When riding newly paved or resurfaced sections, beware loose material and uneven seams. In rural areas, expect farm equipment, animals, and hidden driveways; use a defensive following distance and position to improve visibility. If a road is reported as closed or hazardous, reroute using trusted mapping tools or state DOT alerts.
Protective Gear Recommendations
They should always wear a DOT- or ECE-certified full-face or modular helmet that fits snugly and isn’t past its service life. A visible helmet color and an anti-fog visor help in low light and wet weather. A textile or leather jacket with CE-rated armor at shoulders, elbows, and back provides key impact protection.
Gloves must cover the wrist and include palm abrasion protection. Sturdy pants with knee armor or reinforced riding jeans prevent road rash. Boots should cover the ankle, have a non-slip sole, and protect the toe and heel. Add reflective strips or a high-visibility vest for dawn, dusk, or heavy traffic. For more detailed gear standards and buying guidance, consult the Motorcycle Safety Foundation and consumer helmet test reports.
Top-Rated Motorcycle Routes by Region
This section lists standout rides with clear reasons to choose each one: road type, scenery, surface quality, and key stops. Riders can pick urban loops for shops and sights, rural stretches for twisty pavement, or coastal runs for sea views and breezy straights.
Urban Destinations
City loops suit riders who want short rides with food, fuel, and quick photo stops. Recommended urban routes include waterfront boulevards and historic districts that stay open late and have good pavement. They often feature bike-friendly parking and clear signage.
Riders should look for routes 20–80 km long to avoid heavy traffic and use timed departures to dodge commute hours. Important stops are craft coffee shops, motorcycle-friendly garages, and lookout points for skyline photos. Nighttime rides work well where lighting and policing are predictable.
Safety tips: pick roads with wide lanes and minimal tram tracks. Check for roadwork alerts and event closures before heading out.
Countryside Trails
Countryside trails focus on twisty two-lane roads, rolling hills, and frequent curves. Examples include scenic connector roads that link small towns and provincial parks, often with short elevation changes and well-maintained asphalt.
Expect stretches of 40–200 km with service towns every 40–80 km. Riders should plan fuel, as some segments have limited stations. Recommended stops include diners, local craft shops, and short hiking detours to viewpoints.
Ride at a steady pace and watch for farm vehicles, gravel at corners, and changing weather. A good route map or GPS with offline caching helps when signals drop.
Coastal Adventures
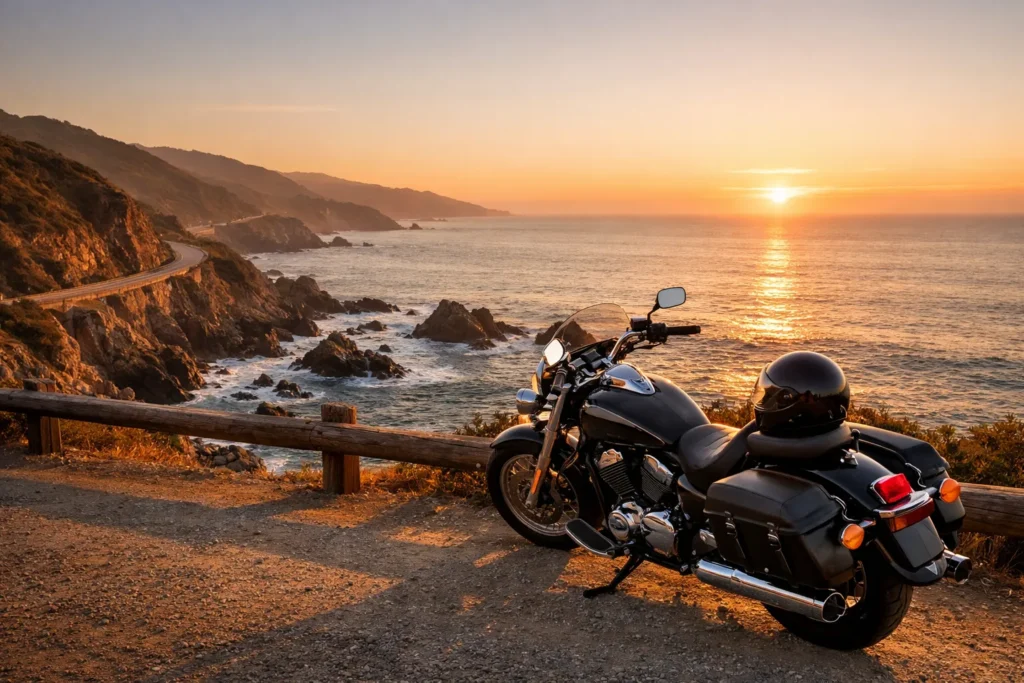
Coastal adventures follow shorelines, offering long sightlines, salt-scented air, and frequent pullouts. Ideal coastal routes run 60–300 km and include seaside towns, lighthouses, and cliffside viewpoints.
Riders should plan stops at seafood restaurants, ferry crossings, and beaches. Watch for crosswinds on exposed sections and wet patches near inlets. Surface conditions vary; some seaside roads are smooth, others show salt wear.
Bring layered clothing for wind and spray, and check tide or ferry timetables if the route uses local ferries.
Planning Your Motorcycle Trip
Riders should pick the best riding windows, shape the route to match road type and scenery, and plan fuel and food stops to avoid long gaps. Practical checks on weather, daylight, and service stations cut risk and keep the ride smooth.
Best Times to Ride
They should ride in the shoulder seasons—late spring and early fall—when temperatures sit between 50–75°F and roads are less crowded. Early morning starts (6–9 AM) give cooler pavement and lighter traffic on popular scenic roads. Avoid midday in summer where heat and glare raise fatigue.
Check local sunrise and sunset times so daylight covers the most remote stretches. Watch forecast models for rain, wind gusts over 20 mph, and temperatures near freezing, which affect grip and comfort. If riding mountain passes, verify seasonal closures and recent road reports before departure.
Route Customization
Riders should choose roads by surface type and curvature: state highways for steady speed, county roads for twisty scenic miles, and forest roads only if the bike and rider suit dirt or gravel. Use route planners that let them set waypoints, avoid highways, and export GPX files to their GPS or phone app.
They should layer points of interest like overlooks, historic sites, and planned photo stops every 30–60 miles. Build contingency options: an alternate lower-elevation route for storms and defined bailout towns with repair shops every 60–90 miles. Save routes offline and print a simple cue sheet for areas with poor signal.
Gas and Food Stops
Riders should map fuel stations along the route with conservative range planning: plan refuels at 65–75% of the bike’s full tank range. Note diesel or premium-only stations if the bike needs specific fuel. In remote areas, locate the last gas stop before long stretches and confirm opening hours.
For food, pick stops that offer quick hot meals and space to park safely. Aim for breaks every 90–120 minutes to rest eyes and hands. Carry snacks, water, and a small stove or coffee if stops are sparse. Keep emergency cash and a basic toolkit near the tank bag for quick access.
Essential Gear for Exploring Nearby Routes
Riders should bring tools that keep them on course and kits that keep them safe. Prioritize a reliable navigation system and basic safety equipment that work in local signal and weather conditions.
Navigation Devices
A dedicated GPS unit designed for motorcycles offers offline maps and glove-friendly controls. Choose a model with preloaded regional maps, turn-by-turn voice prompts, and a bright screen readable in sunlight. Mount it to the handlebars with a vibration-damping cradle and secure power via a USB or auxiliary wiring harness.
Smartphone navigation can work if paired with a weatherproof mount and a power bank. Download offline map areas for spots with poor reception. Carry a paper map as backup for local backroads and trailheads. Finally, bring an extra USB cable and a small power bank (5,000–10,000 mAh) to avoid losing navigation mid-ride.
Safety Equipment
A DOT- or ECE-rated helmet and a riding jacket with armor are the first priorities. Make sure the helmet fits snugly, the jacket has CE-rated shoulder and elbow protection, and the rider wears gloves and CE-rated pants when possible.
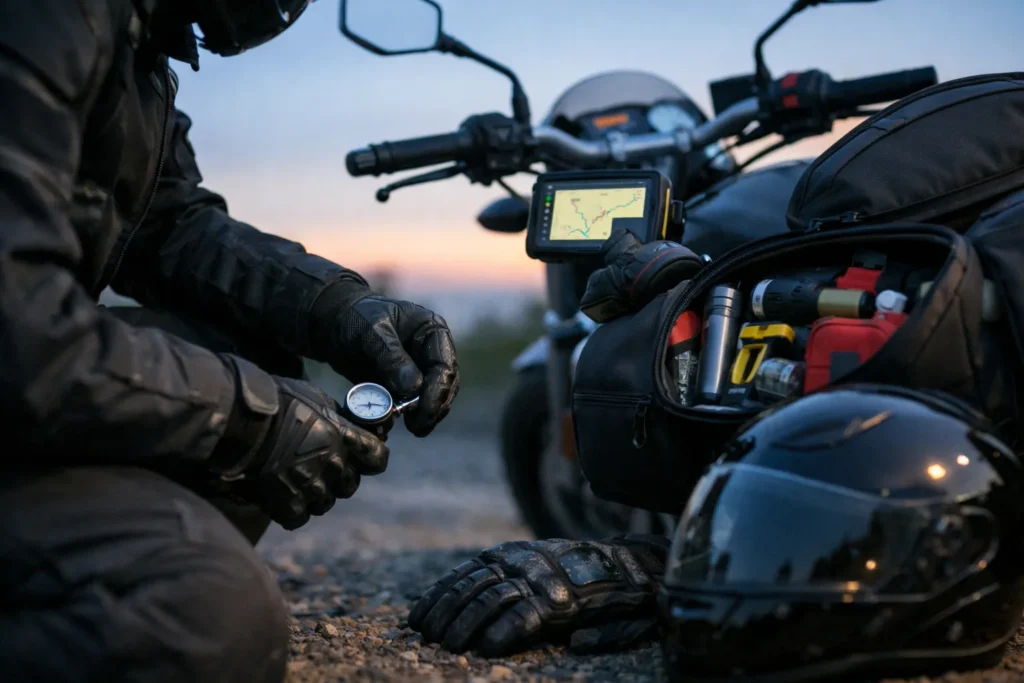
Carry a basic roadside kit: tire repair plugs, a compact inflator or CO2 cartridges, a multi-tool, and spare fuses. Add a high-visibility vest for roadside stops, a small first-aid kit, and a flashlight or headlamp with extra batteries. Store critical items in an easily reachable tank bag or top case so they’re available quickly during an emergency.
Community Events and Group Rides
Local clubs and meetup groups post regular group rides, charity runs, and bike nights. They often list rides by difficulty, distance, and start time so riders can pick events that match their skill and schedule.
Many regional calendars and rider communities keep event listings up to date. Examples include motorcycle event calendars, club pages, and community groups that share rides, swap meets, and rallies.
Riders should check event details before going. Important items: start location, estimated mileage, ride pace, and any fees or donations. Bringing proper gear and a charged phone improves safety and communication.
Joining a group ride teaches pacing, hand signals, and riding in formation. New riders can learn from more experienced riders in a controlled setting. Groups usually emphasize safety and respect for local traffic laws.
Quick checklist before a group ride:
- Confirm meeting time and place
- Check fuel and tire pressure
- Carry ID and emergency contact info
- Know the route or have a map/app
Organizers often use social platforms, calendars, and club websites to share updates. Riders should follow official channels for last-minute changes and weather-related cancellations.
FAQS
What is a good way to find “motorcycle route near me”?
They can use apps and sites like REVER, Roadtrippers, and local route libraries to find mapped rides. Community platforms help by showing rider-tracked routes and reviews.
How should riders pick a route for their skill level?
They should match route difficulty to experience. Beginner riders should choose smoother, wider roads; experienced riders may pick twisty canyon or mountain passes.
What safety checks are recommended before a ride?
Perform a quick bike inspection: tires, brakes, lights, and fluids. Bring basic tools, a charged phone, and weather-appropriate gear.
How long should a typical day ride be?
Day rides often range from 1 to 6 hours on the bike, depending on stops. Plan fuel and rest breaks every 60–90 minutes.
Are there legal or permit issues to consider?
Riders must follow local traffic laws and wear required gear where mandated. Some parks or private roads may need permits or fees.
What about navigation and offline maps?
Download offline maps or GPX files for areas with poor cell coverage. Many route apps let riders export tracks and view turn-by-turn directions.
How can riders discover scenic detours and viewpoints?
Local route sites and rider communities list points of interest and recommended detours. They can also look for state parks, coastal overlooks, and mountain vistas on route maps.
Is group riding different from solo riding?
Group rides require clear signals, staggered formations, and pre-ride briefings. Each rider should know the planned stops and emergency procedures.
Conclusion
Finding a good motorcycle route near them starts with simple choices. They can use apps like Roadtrippers, calimoto, or MotoPlanner to see roads, points of interest, and elevation. These tools save time and reduce guesswork.
Riders should match route difficulty to skill and bike type. Shorter loop rides suit quick trips, while long-distance routes need extra planning for fuel and rest. Weather and road surface matter; checking conditions before leaving helps avoid surprises.
Safety and enjoyment go hand in hand. They should plan stops, carry basic tools, and share their plan with someone. A spare tire patch kit, charged phone, and proper gear cut risk and stress.
They can keep improving routes by saving favorites and reading community reviews. Sharing tracks helps other riders and builds local knowledge. Over time, their map of trusted roads will grow.
Practical choices make trips reliable and fun. Use route planners, respect limits, and prepare for the unexpected. That approach gives riders more safe, memorable miles.